Camera
The client should see the angle the designer framed and approved, not a more dramatic but unrelated composition.
Vivid Render turns an approved SketchUp view into a photoreal interior image. It is built for architects and interior designers who need faster visualization without handing their design decisions to an empty text prompt.
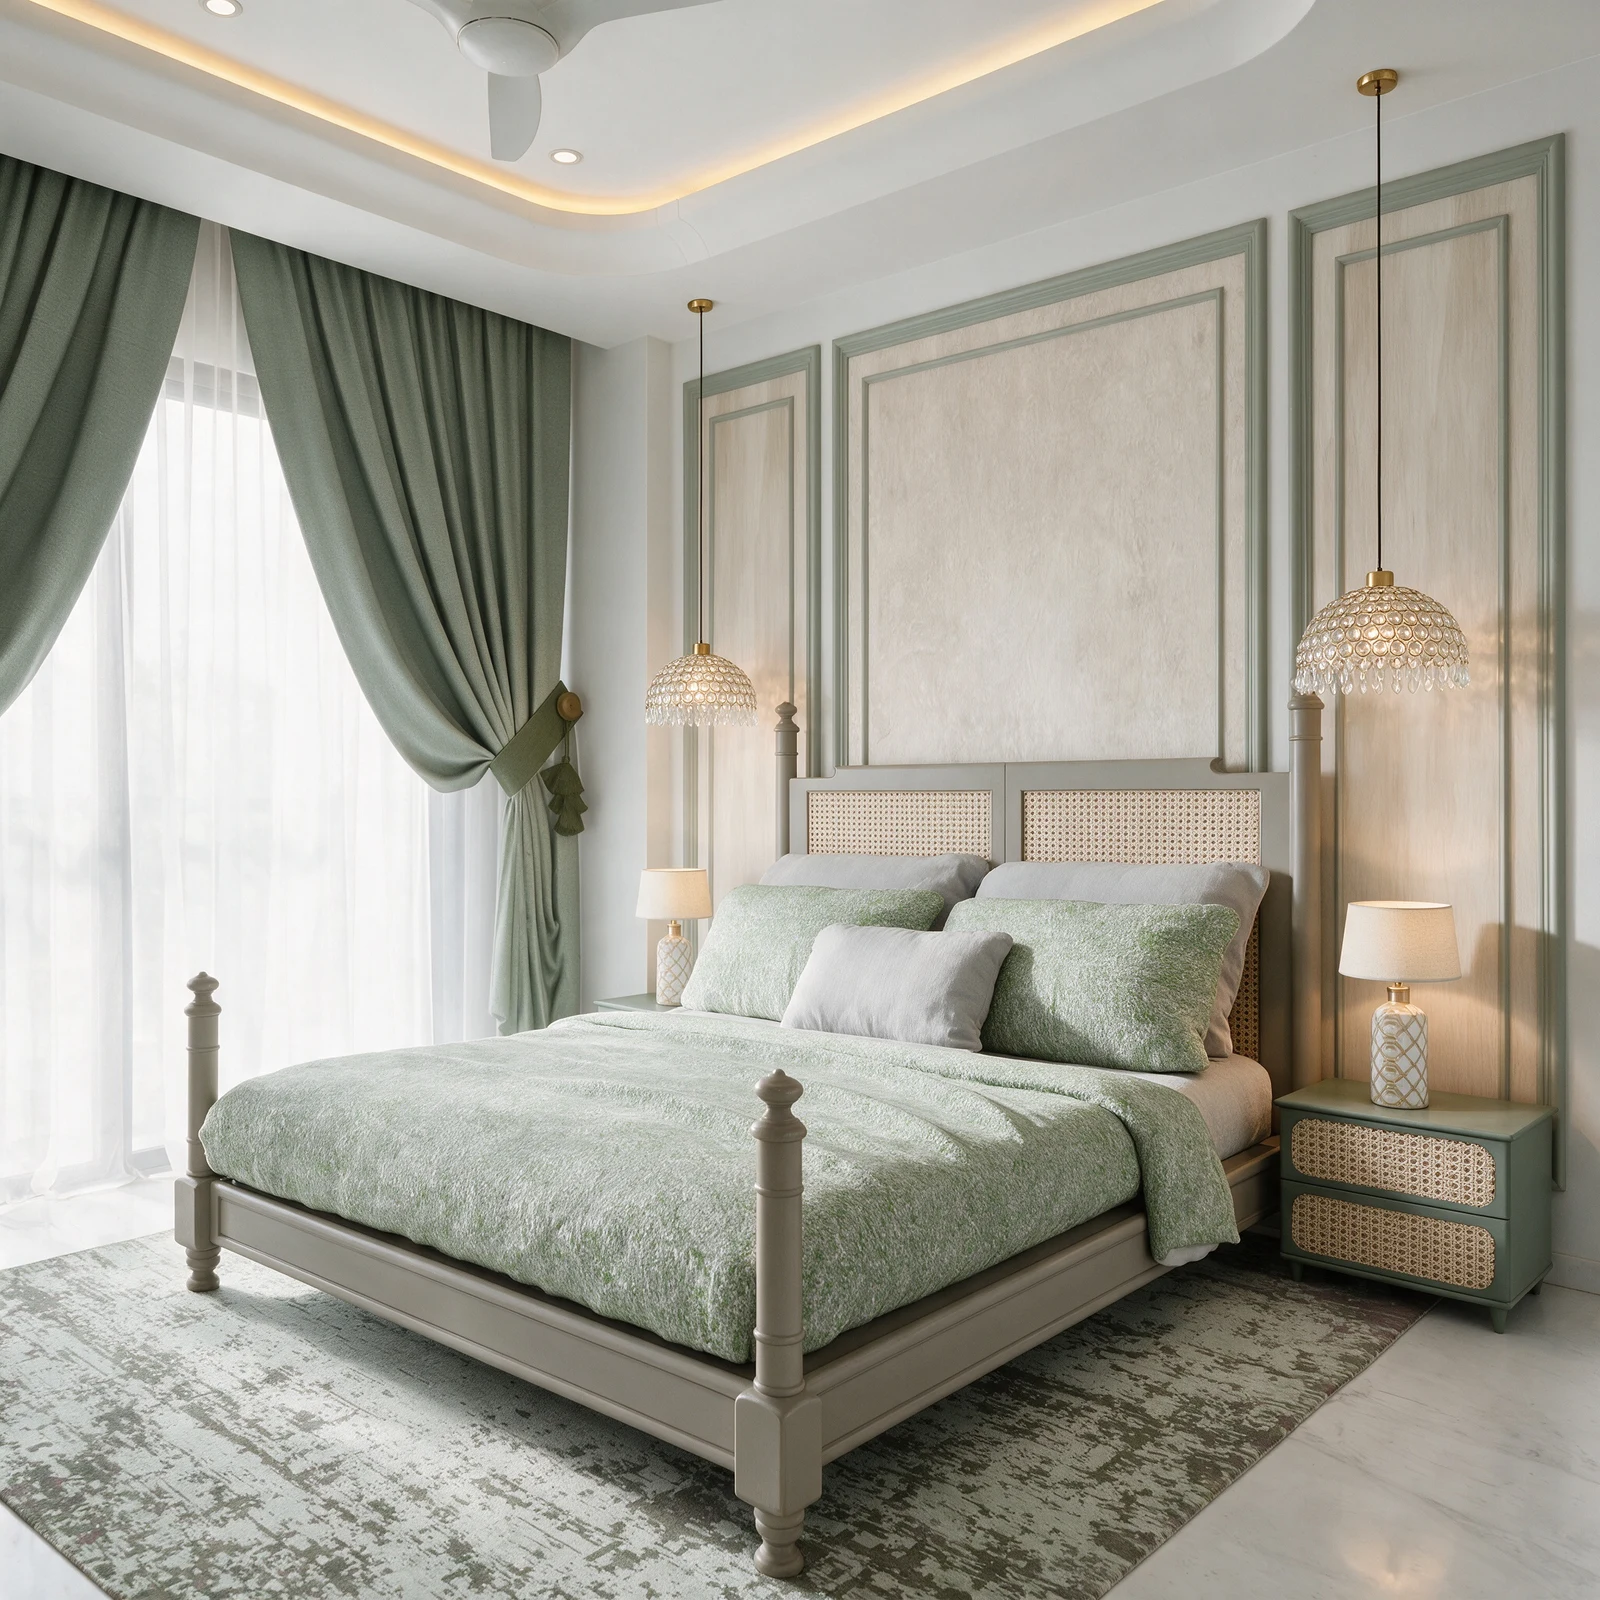
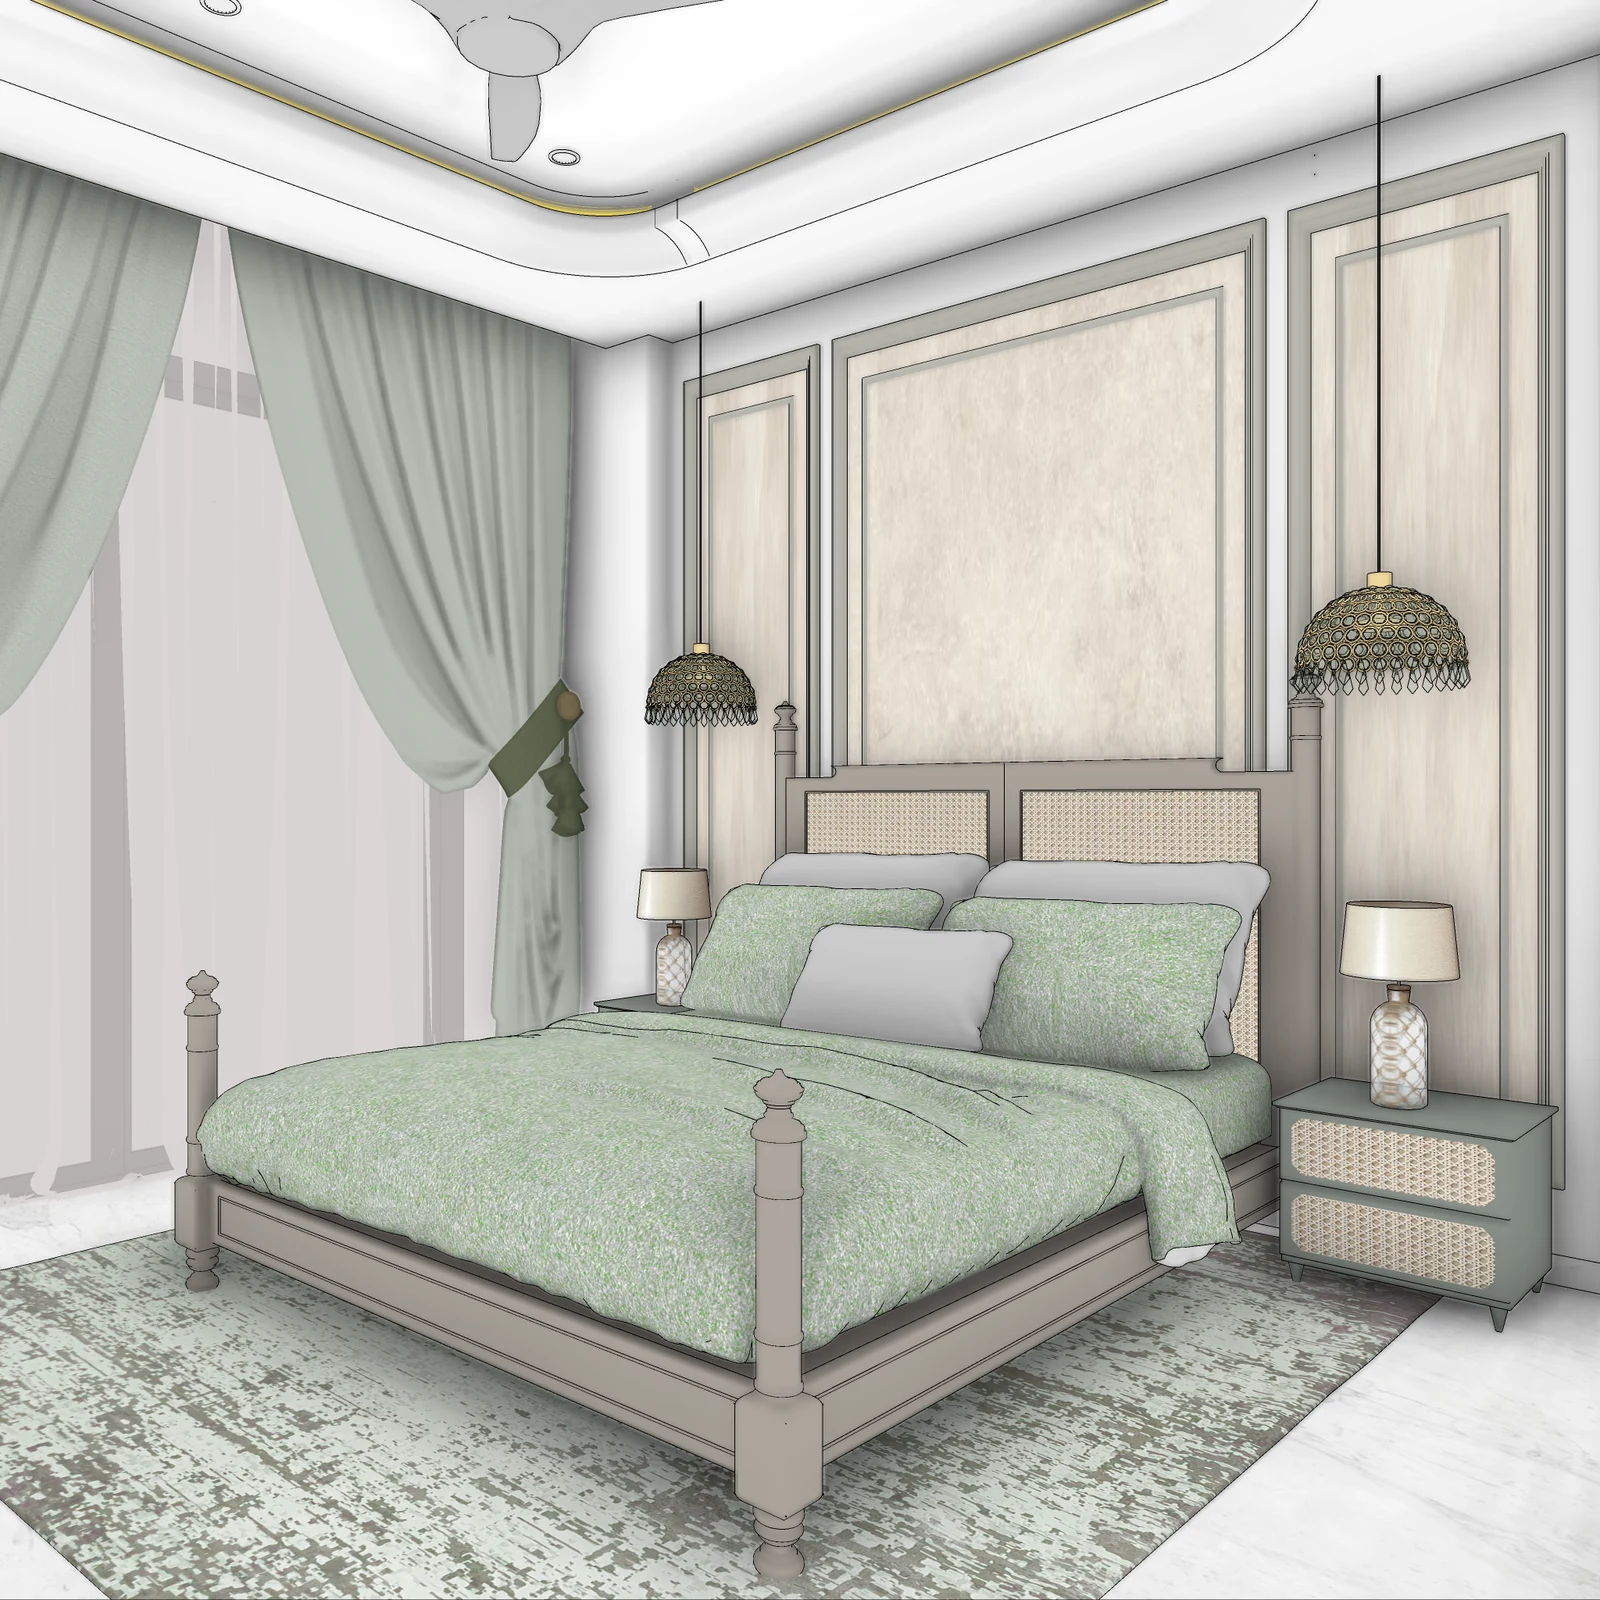
AI rendering is most useful after the designer has already made the important choices. The floor plan, camera, ceiling, furniture, material direction and intended lighting should come from the project—not from an unrelated generated room. Vivid treats the SketchUp screenshot as the visual instruction and then adds photographic light, surface response and atmosphere.
This makes the workflow different from typing “luxury bedroom” into a general image generator. A generic prompt can produce an attractive picture while moving a window, replacing a bed or inventing a wall. Vivid is designed around a narrower job: make the submitted view believable while retaining the decisions that made it worth presenting.
The client should see the angle the designer framed and approved, not a more dramatic but unrelated composition.
Walls, openings, ceiling details and furniture positions must remain recognisable from the model.
Wood stays wood, glass stays glass and the palette should follow the visible source instead of drifting randomly.
Vivid’s SketchUp workflow lets the team mark intended glow locations rather than asking AI to invent concealed lights.
Frame the camera in SketchUp and make sure the room contains the objects and materials you intend to show.
Use the Vivid Export plugin or upload a viewport image. The web workspace keeps related views together.
Compare the result to the source, write a focused change or mark an exact area, then download the approved 2K version.
Vivid is not positioned as a replacement for every physically based rendering task. It is strongest when a design team needs convincing interior stills quickly: an early client review, a material option, a room set, a sales presentation or a rapid revision cycle. For a closer look at the source discipline behind the result, read the real SketchUp bedroom case study.
AI rendering uses a visual source such as a SketchUp viewport to create a more realistic presentation image. Vivid is source-driven: the existing camera, room and furniture provide the brief instead of starting from an empty text prompt.
No. Generative room-design tools may invent a new layout. Vivid is intended for designers who already made the layout and need a convincing image of that design.
No. The image is processed in the cloud, so the local computer only needs to run SketchUp and a modern browser.
A standard 2K interior render typically returns in about a minute. Queue time and scene complexity can affect the exact result.
Vivid is launching with interior stills. A dedicated exterior workflow is on the public roadmap; the current product should not be evaluated or purchased as an exterior renderer yet.
Start with a SketchUp scene. Keep the design decisions. Make the result presentation-ready.
Get the SketchUp plugin