Camera and crop
The after image needed to show the same face of the room from the same practical presentation angle.
This is not a stock room or an image created to fit a marketing headline. It is a real SketchUp view used to judge whether Vivid could add realism while keeping the design recognisable.
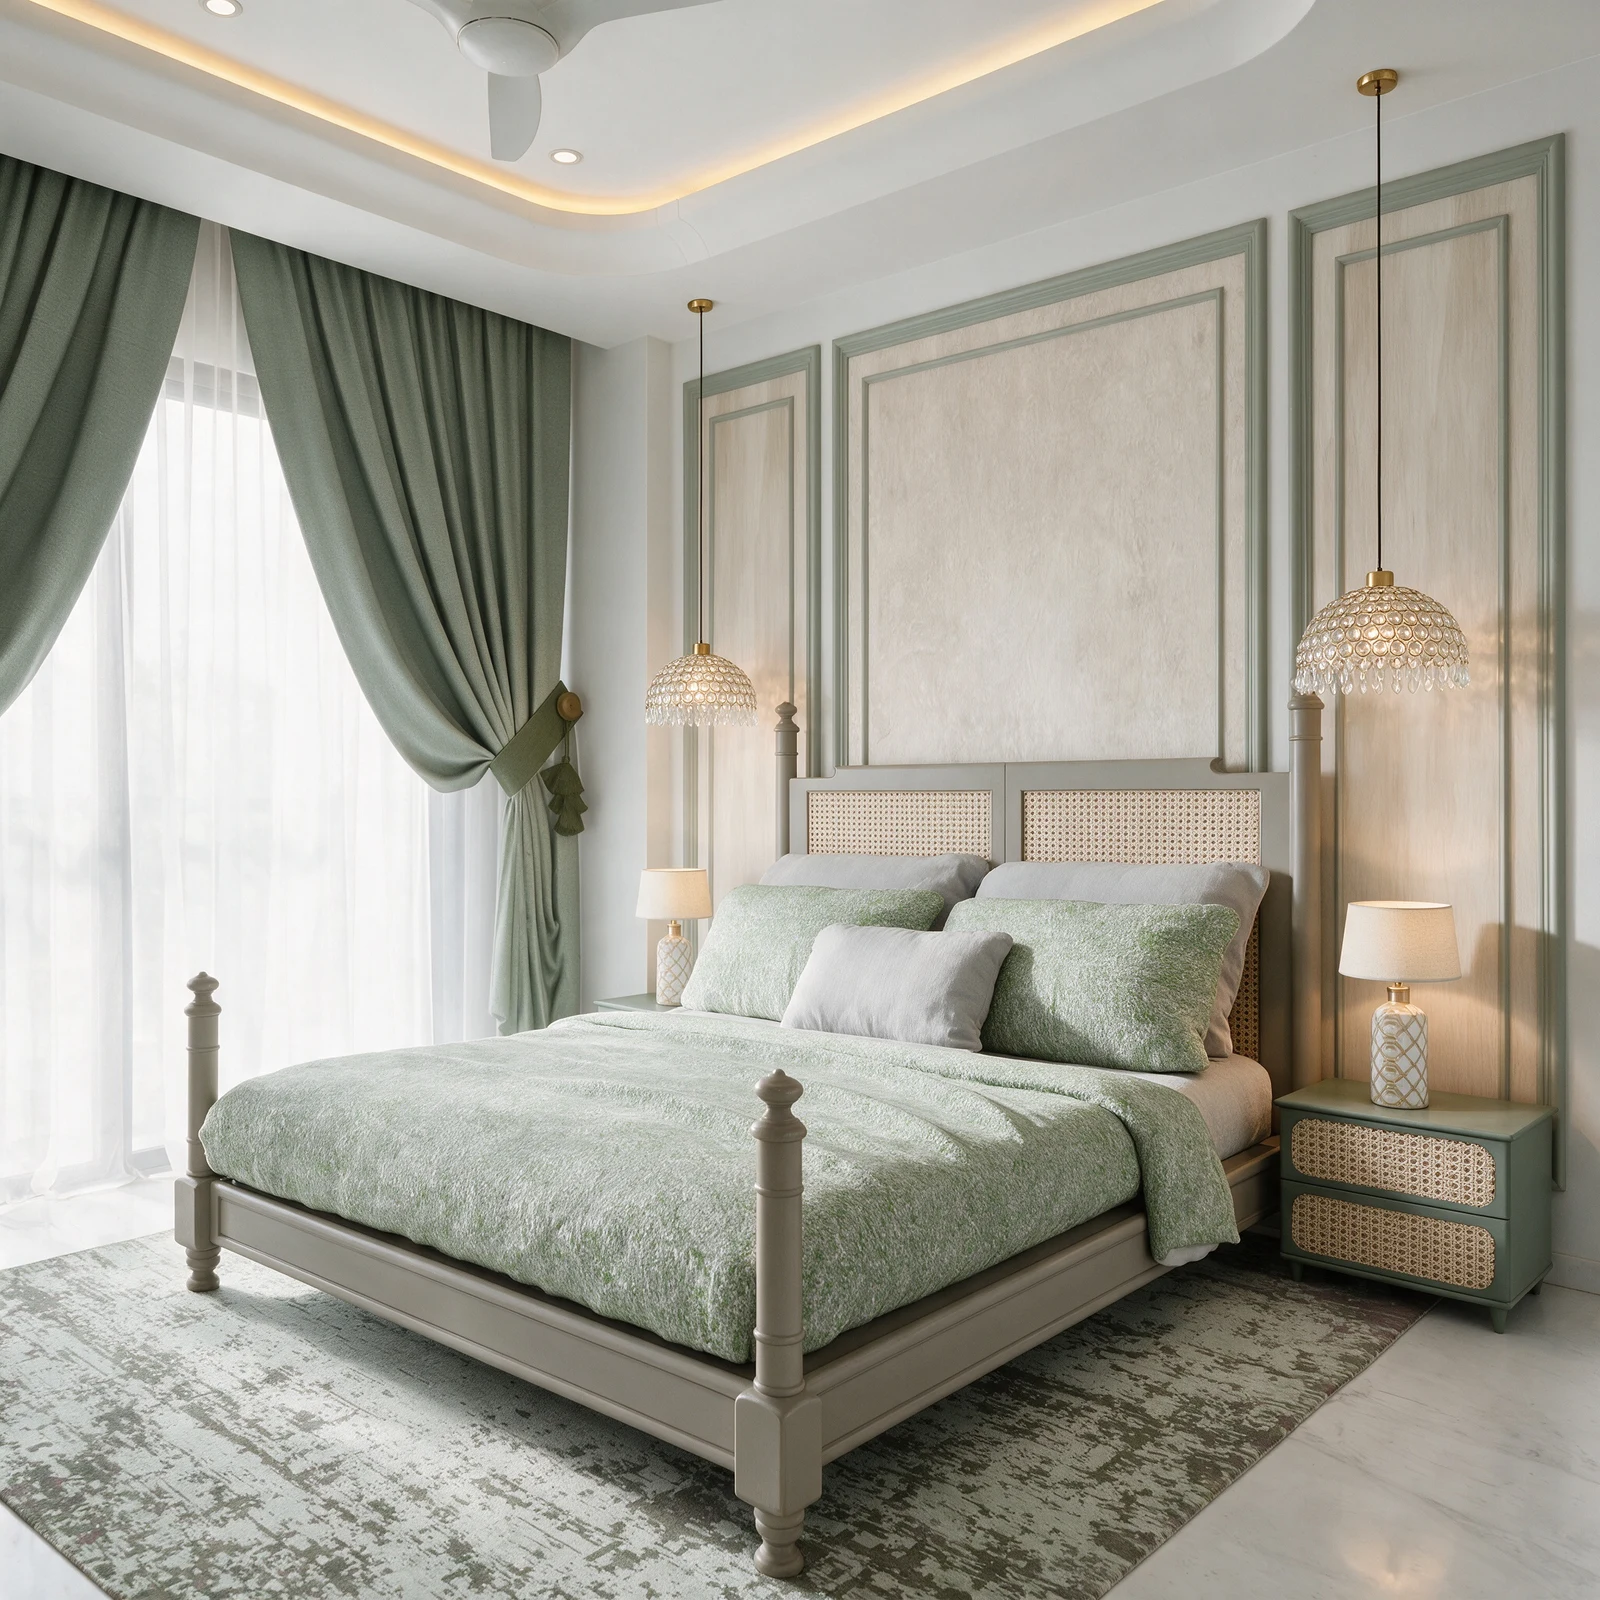
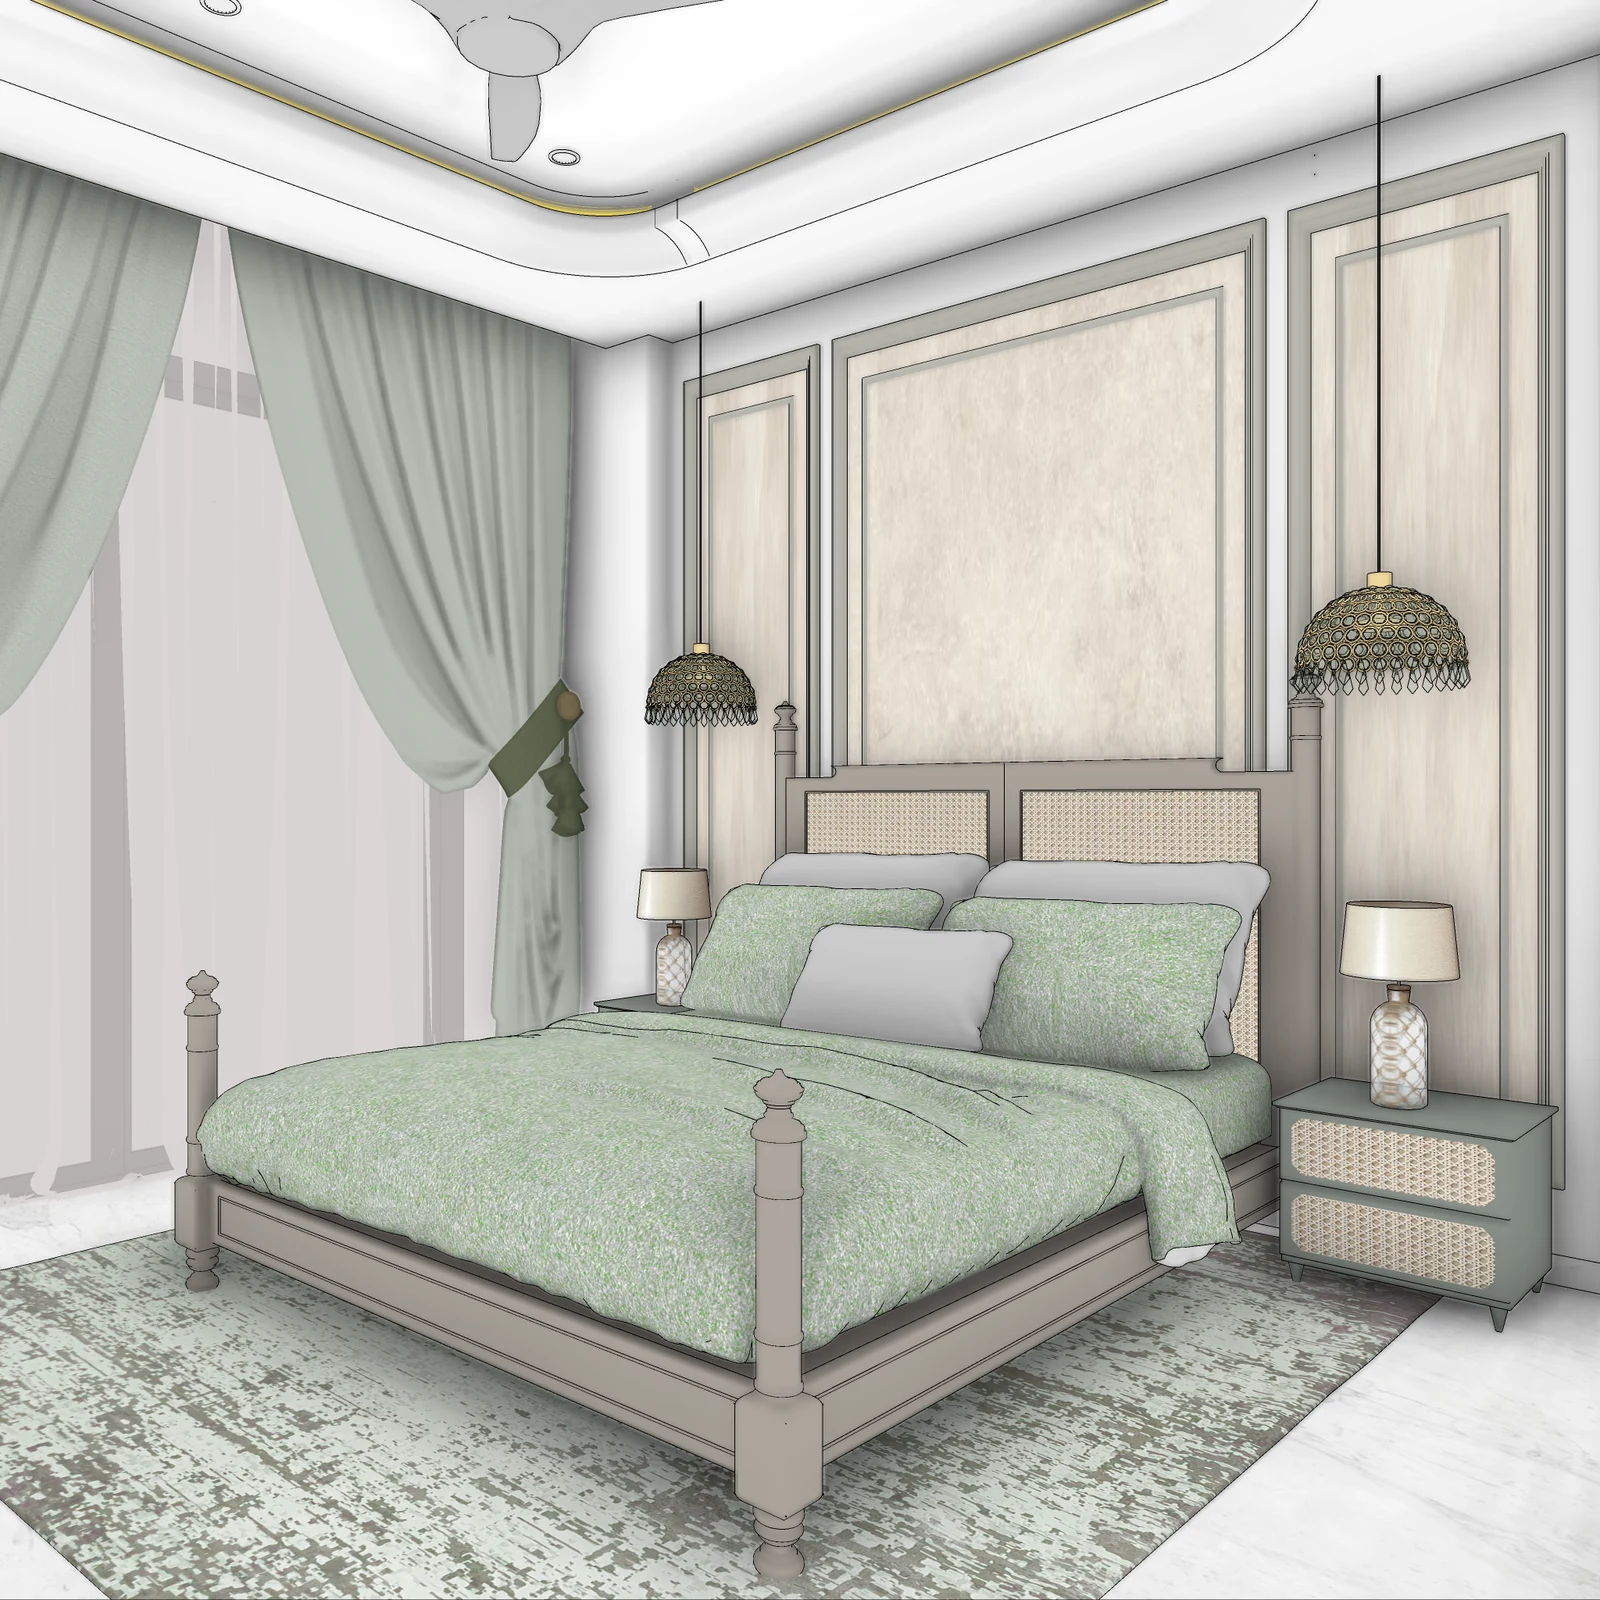
The source already contained the decisions that mattered: a centred bed, a layered ceiling, a distinctive headboard wall, side furniture, curtains and a fixed camera. The rendering task was not to design a more fashionable bedroom. It was to translate those relationships into a convincing client image.
The visible SketchUp frame therefore acted as the main constraint. It established what was in the room and how the client was meant to see it. Vivid’s role was to add photographic material response, softer light behaviour and depth while retaining enough one-to-one evidence for a designer to trust the comparison.
The after image needed to show the same face of the room from the same practical presentation angle.
The bed remained the central mass, with side pieces and surrounding circulation reading in the same places.
The major ceiling layers and the defining treatment behind the bed stayed identifiable from the source.
Surface character and illumination became more photographic without changing the room into another scheme.
AI rendering examples are often selected only for visual impact. Architectural teams need a stricter comparison: does the final image still correspond to the source view? The slider at the top of this page keeps both images in the same frame so camera and object relationships can be inspected directly.
That comparison also exposes the limits of the process. Fine decorative details, colour and reflections deserve a deliberate review. If a result moves something important, the right response is a focused revision—not pretending the difference does not matter.
The model does not need to be a fully configured render scene, but the screenshot must clearly communicate the camera, geometry and design intent. Read the SketchUp AI rendering workflow to see how Vivid Export helps make that source consistent.
It is a real Vistaar Studio interior view used to test and explain Vivid’s source-driven rendering workflow. The before image is the SketchUp view and the after image is the resulting presentation render.
The approved camera, bed position, ceiling design, principal wall treatment and overall room relationships were the primary visual anchors.
No. The SketchUp screenshot supplied the visible design. Scene controls and rendering instructions were used to add realism without asking for a different bedroom.
No. Architectural images should always be checked against the source. The checklist on this page covers camera, geometry, materials, lighting and fine details.
Start with a SketchUp scene. Keep the design decisions. Make the result presentation-ready.
Get the SketchUp plugin